
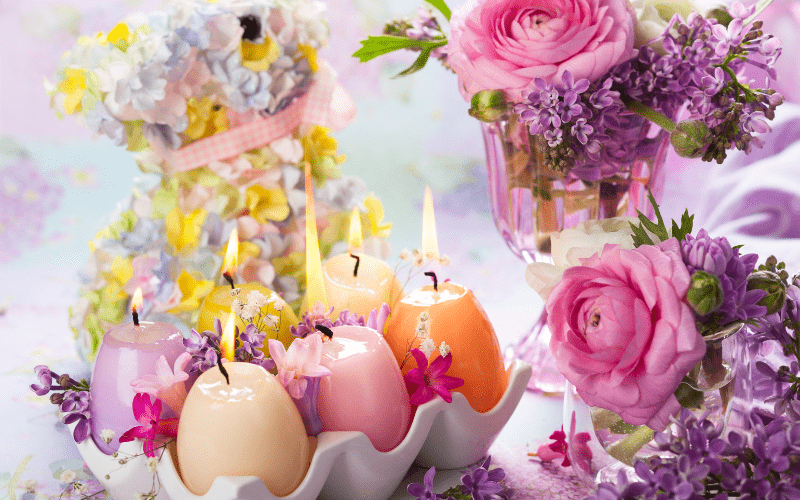
Did you know you can make candle art using real flowers?!
Among the countless candle art ideas, one that truly captivates me is the combination of real flowers and Mod Podge.
With these simple yet beautiful materials, you can create a stunning candle holder that will enchant your family and serve as an exquisite centerpiece for your gatherings.
This project is a perfect blend of eco-friendliness, budget-consciousness, and customization, making it an ideal gift as well.
So don’t discard those lovely flowers from Mother’s Day!
I was fortunate enough to receive a breathtaking bouquet for Dominican Mother’s Day from someone incredibly special in my life. My son Anthony!
Inspired by their beauty, I decided to craft something imaginative with the blooms, ensuring that I’d always have a cherished memory of this meaningful gift.
So, are you ready to transform your gift into a lasting memory?
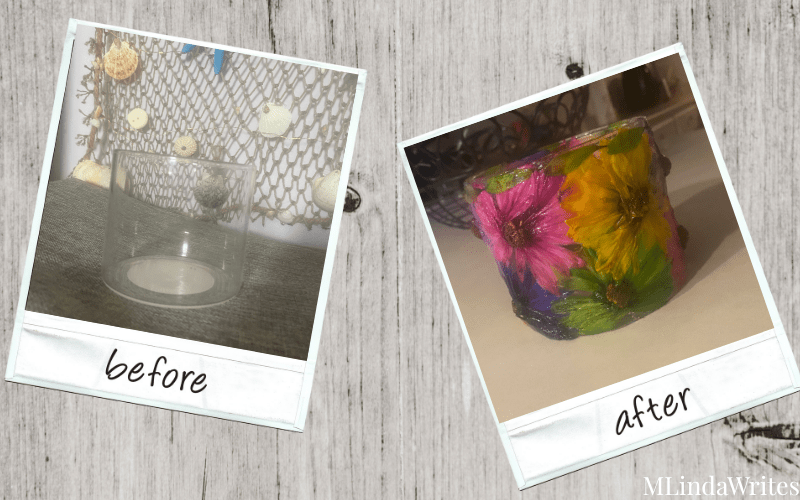
It’s time to upcycle that empty glass candle jar into a gorgeous personalized flower candle holder that will radiate warmth and charm!
This page contains affiliate links, and I earn a commission if you purchase through one of the links at no cost to you.
Gathering Your Supplies

Let’s get started! Below, I will walk you through the steps on how to create this beautiful candle art using a used candle jar and real flowers.
The Star of the Show
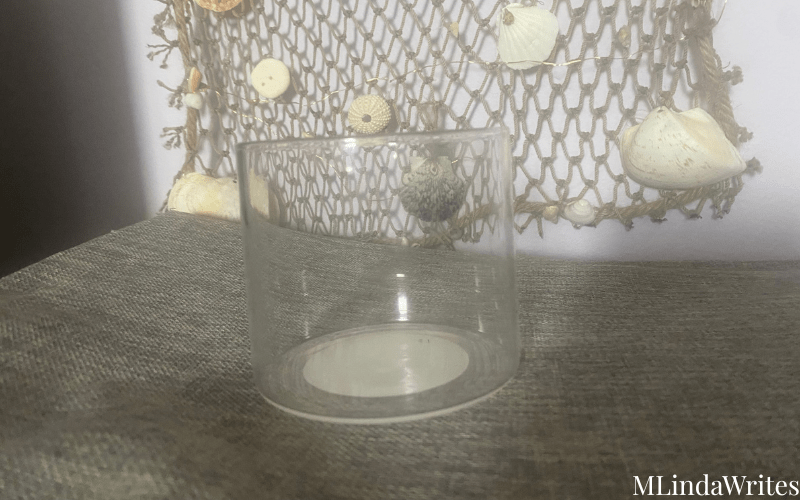
Grab an empty, clean glass candle jar (ensure all wax residue is removed by using hot water and a paper towel). You can ensure a spotless glass each time by using newspaper!
The Floral Elements
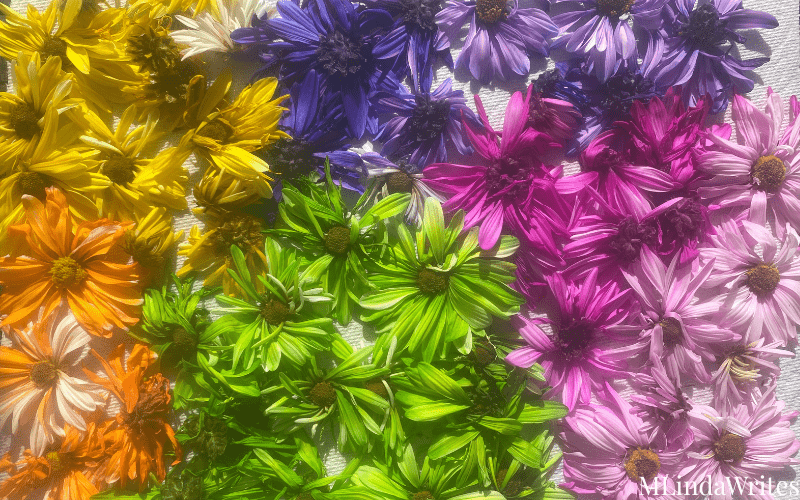
You can use fresh flowers or week-old flowers right before you want to discard them; it also works great (the ideal types are those with flatter petals, less bulky blooms, such as pansies, colorful flowers, violas, small daisies, single rose petals, and ferns).
Tips for pressing flowers
There are various methods for pressing flowers, which can make the process easier by helping them adhere to the jar.
Heavy books and microwave presses are popular methods for pressing flowers.
I did not press my flowers. They were one week old, and I let them dry overnight on paper towels and a rack.
The Adhesive & Sealant
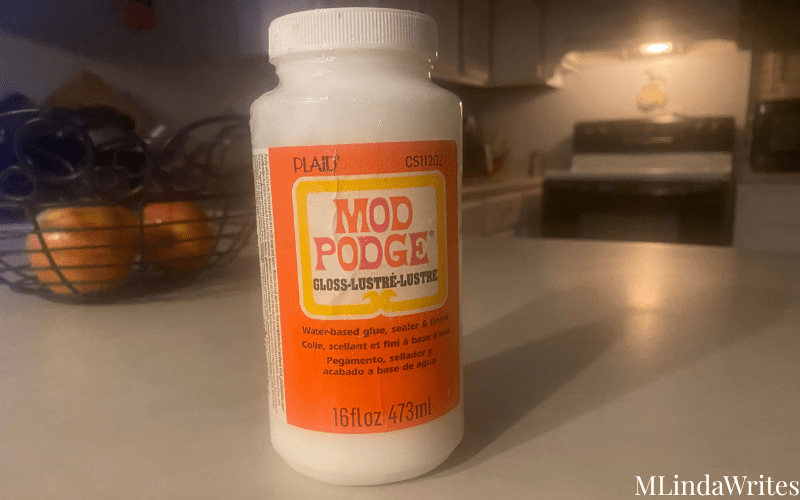
Mod Podge
There are two versions available for sealing your candle art: Matte or Glossy.
In my experience, after decades of using Mod Podge, I have concluded that the glossy version is the best to use because it offers a shiny, reflective finish.
Another bonus is that you don’t need the Mod Podge spray acrylic sealer if you use the Mod Podge gloss for your candle Art.
This is because the Mod Podge gloss glue is a versatile all-in-one product that serves as both glue, sealer, and finish.
Essential Tools
You can opt to use tools like a small paintbrush or a foam brush. I prefer to use foam brushes or even my fingers to press and flatten the flowers onto the candle jar.
Tweezers are helpful for delicate flower placement. For example, to create the green leaf design near the top, I used tweezers to carefully place the leaves.
Scissors are great for trimming flower stems if necessary, to ensure a smooth placement process.
Lastly, Paper towels or old cloth will help protect surfaces. You can also opt to use cardboard or old newspapers.
I created my candle art jar on top of newspapers.
Then, I placed my week-old flowers on paper towels to dry out overnight.
Preparing Your Flowers for Candle Art
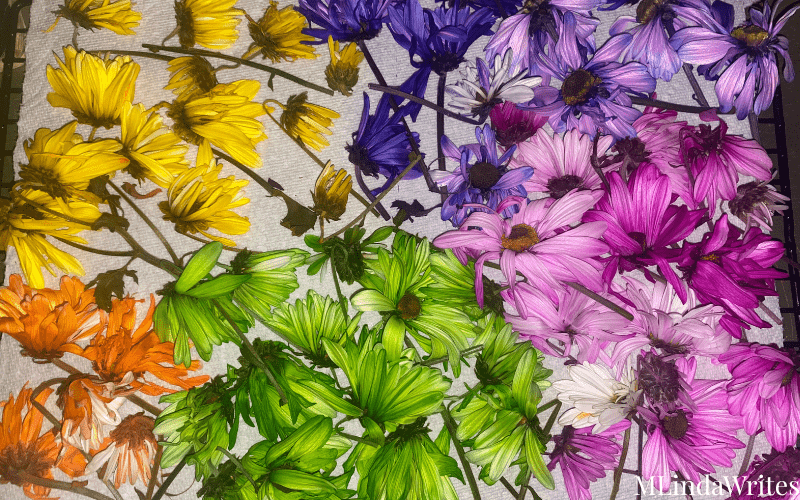
The Importance of Pressed or Flattened Flowers
If you use fresh flowers, they will mold. This is why using flowers that are dry or at least a week old is helpful.
Cut the stems off to make the placement of the flowers easier and smoother.
Quick Tips for Pressing
If using fresh, press them for at least a week between heavy books.
Ensure they are completely flat and dry before use.
The Step-by-Step Crafting Candle Art Process
Clean Your Jar Thoroughly
It is important to clean your jar thoroughly and ensure it is spotless. Having a dry surface makes for the best adhesion of your flowers for your candle art.
Plan Your Design
Before applying Mod Podge, arrange your pressed flowers around the jar to visualize the layout. Consider scattering, creating a pattern, or achieving full coverage.
Applying the First Layer of Mod Podge
Apply a thin, even layer of Mod Podge directly onto a small section of the glass where you want to place a flower.
Placing Your Flowers
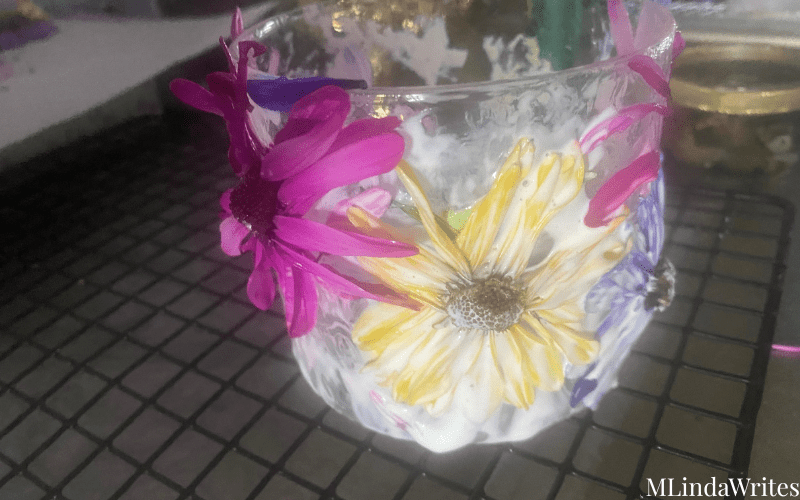
Carefully pick up a pressed flower with tweezers and place it onto the wet Mod Podge.
Gently press it down to ensure good contact, smoothing out any air bubbles.
Sealing the Flowers
Once a flower is in place, carefully brush another thin layer of Mod Podge over the top of the flower, extending slightly beyond its edges. This seals it in. Repeat this process, working in small sections, until all flowers are adhered.
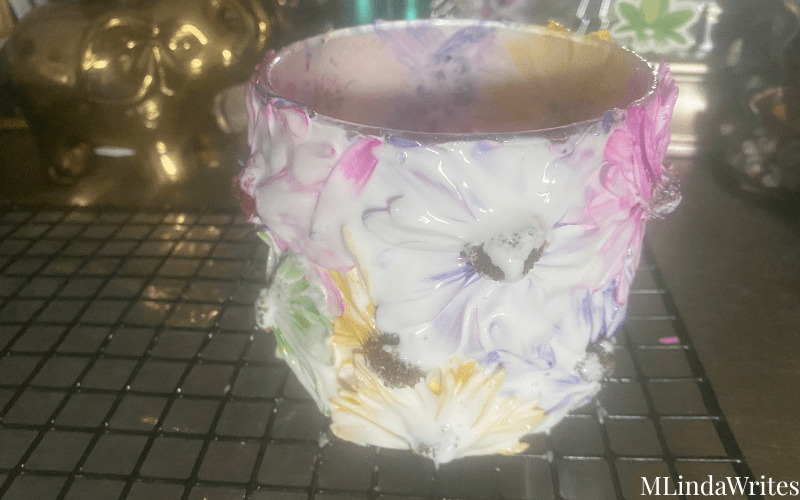
The Final Seal
Once all flowers are adhered and sealed individually, apply a final, even coat of Mod Podge over the entire decorated surface of the jar. This provides an extra layer of protection and a uniform finish.
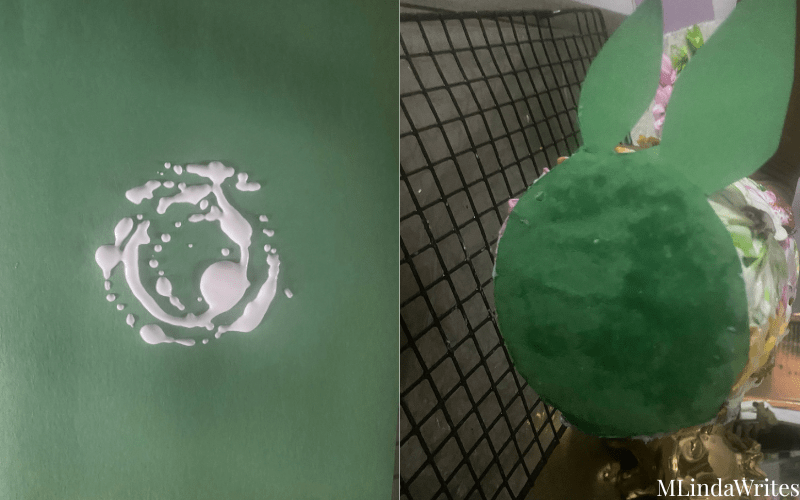
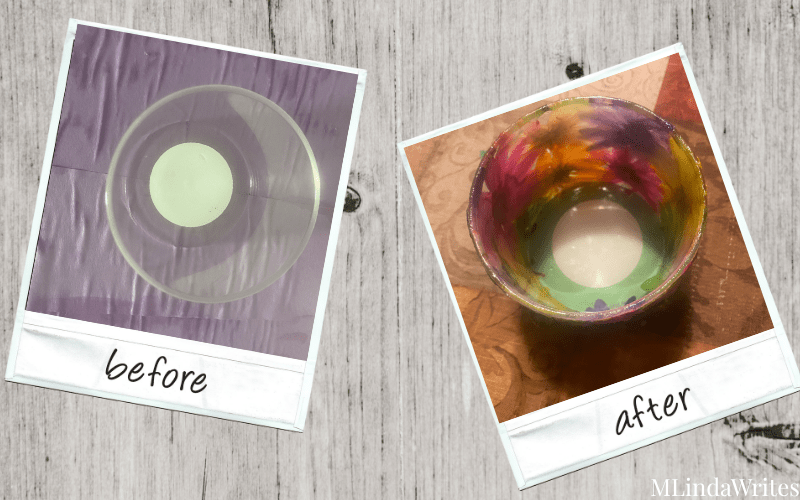
I made a cute green decoration for the top rim of the candle holder using the petals of one of the neon green flowers.
Drying Time
Drying time takes time (usually several hours, or overnight). Remember to have patience! It’s essential to apply multiple coats for added durability, allowing sufficient drying time between each coat.
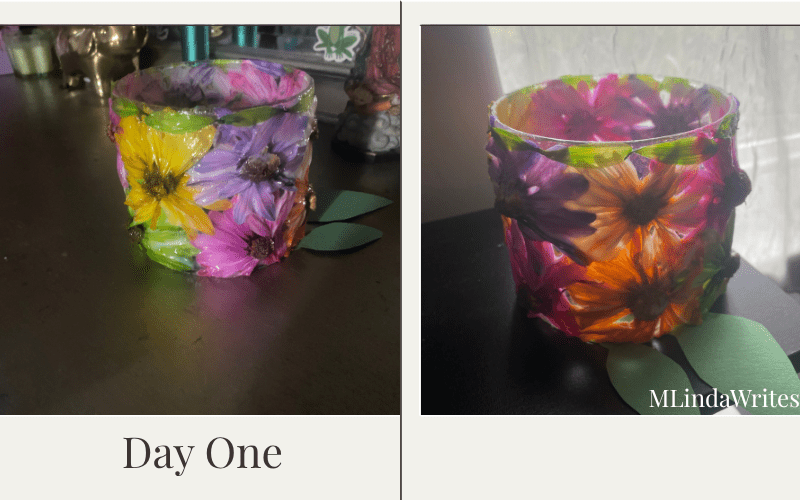
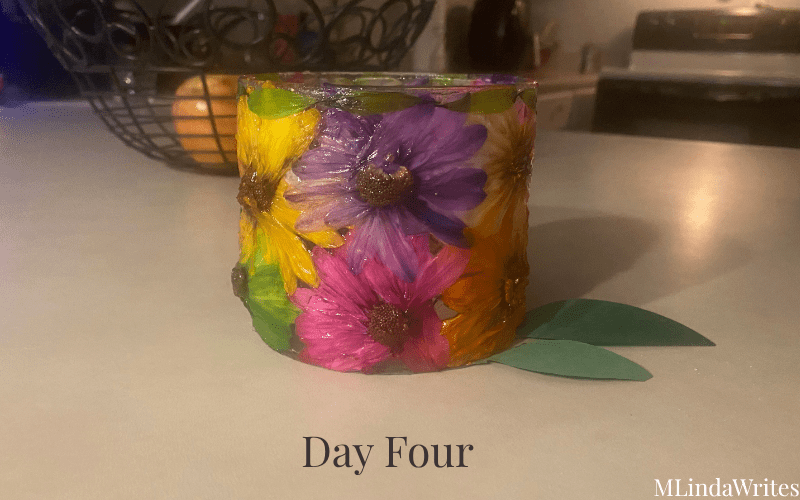
It took my candle art 4 days to fully dry.
I let it dry overnight on a drying rack and used a cut-out green construction paper. I glued it to the bottom to prevent the flowers from sticking to the rack.
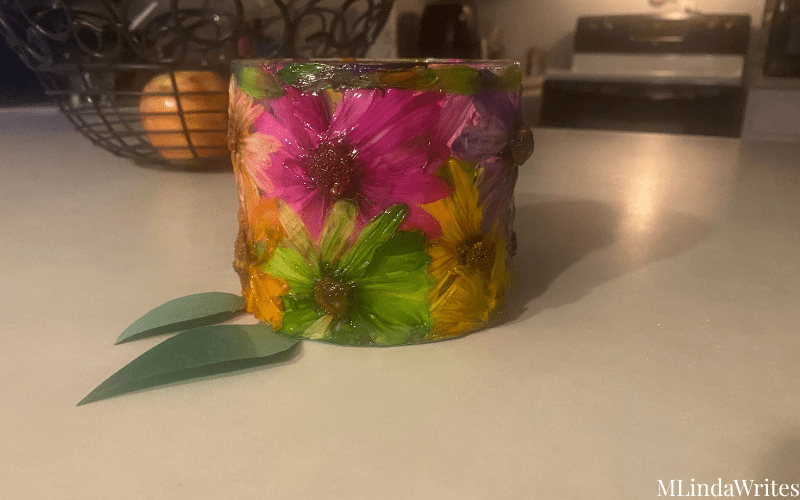
Little did I know how cool it would look! Finally, on day four, the drying process was complete, leaving me with a fully dry candle to display.
Displaying Your Masterpiece Candle Art
Adding a Candle
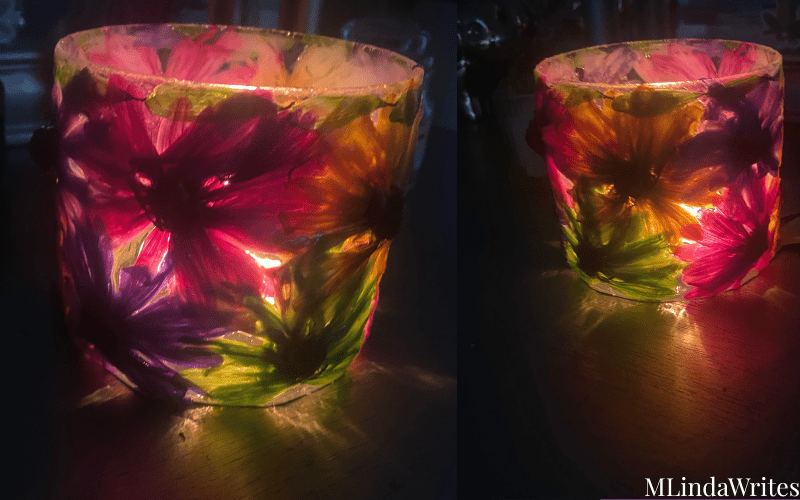
Place a small tea light or battery-operated LED candle inside. Caution: Do not use a large flame candle that might heat the glass excessively near the dried flowers/Mod Podge.
Where to Display
You can display your beautiful candle art on a mantelpiece, shelf, bedside table, or as a centerpiece.
Gifting Idea
These candle art real flower holders are one of the most perfect handmade gifts for birthdays, Mother’s Day, and housewarmings. Create various candles with the leftover flowers!
Tips & Troubleshooting
Air Bubbles
To gently smooth out the air bubbles, lightly press the flowers using your fingers to stroke them away.
Flower Bleeding
The flower bleeding can occur due to excessive moisture or thin petals. Ensure that your flowers are properly prepared by following the steps above. If your flowers are not cooperating, try different types of flowers. Ones that are not too thin, but not too thick.
Uneven Coating
Apply thin, even layers. By applying thin, even layers, you ensure an even overall look to your candle art.
Cleaning Your Brush
Immediately after use, soak the foam brushes in a cup of warm water to ensure that all the glue can be easily washed off. Rinse it after soaking for an hour. Make sure to squeeze the brush as you rinse it off under running water. Set the foam brushes to dry on a paper towel.
Safety Note
Use only small tea lights or LED candles. Mod Podge is flammable when wet, and while sealed, direct exposure to high heat from a large flame is not recommended.
Conclusion
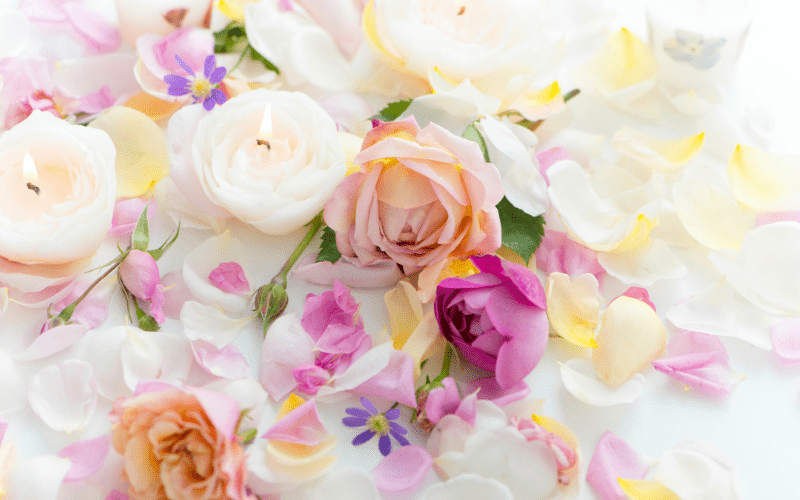
Creating candle art is a fun and therapeutic way to make something beautiful with your hands.
So, go ahead and gather your empty candle jars, those beautiful flowers, and some Mod Podge.
With a few simple steps, you’ll transform forgotten items into radiant, personalized candle holders.
It’s a wonderful way to add a touch of handmade charm to your home or create heartfelt gifts for loved ones.
Get ready to illuminate your space with your very own unique candle art!
The beauty of this candle art is the ability of repurposing and bringing nature indoors while up-cycling.
Do you want to share your candle creation with me? Follow my social media below! I can’t wait to see what you create!
Sign up for my newsletter for updates on new blogs below and receive free checklists today!
Click here for human-written content, and enjoy more blog posts!
Marlenny Linda is more than just a writer; she's a passionate bilingual advocate for families with children with medical conditions. With a background in teaching English (TESOL/TEFL) and a Bachelor of Science in Liberal Arts, she crafts engaging, SEO-optimized content that informs, inspires, and connects with these families.
Her specialty is long-form content, where she dives deep into the topics that matter most, from navigating educational resources to fostering a fulfilling life for your child. Marlenny's innovative approach keeps audiences engaged and coming back for more.